
What does this DIY do?
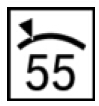
Replace and code multifunction steering-wheel switch from LIM function to dynamic cruise control capability on BMW F20 or F30. This will allow the car to have dynamic cruise control capability. The set speed can be selected from 30 km/h to 180 km/h: in convenient steps of 10 or fine steps of 1. The set speed is displayed on the instrument panel via speedo dial and briefly on information display.

Dynamic Cruise Control Dynamic cruise control is an electronic cruise control system with an extra braking function. This also includes the Curve Speed Limiter that reduces the speed in curves for comfortable lateral acceleration. At the end of the curve the car accelerates and resumes the original speed. The driver can change this in increments of 1 or 10 km/h. Acceleration and deceleration in two dynamic settings can be controlled by manipulating the lever on the steering.

Brief component description:
Multifunction steering-wheel switch
The multifunction steering wheel contains a horn switch and airbag plus, depending on the model, buttons for controlling the radio, telephone and cruise control. The buttons are split between 2 switch blocks; left and right.
Functional description
The left multifunction steering wheel switch block is directly connected to the right one via a plug connection. This means that all the button signals in the left multifunction steering wheel switch block are detected and digitised in the electronics of the right switch block.
The right multifunction steering wheel switch block sends the signals via the local interconnect network bus to the steering column switch cluster. The steering column switch cluster is the data interface between the local interconnect network bus and FlexRay. All button signals are sent as FlexRay messages.
The right multifunction steering wheel switch block is directly connected to the left one via a ribbon cable.


What is this DIY?
This DIY will guide you on how to change/code the multifunction steering-wheel switch with cruise control function. The bimmer can be either F20/F30 series with automatic air condition.
Part required:
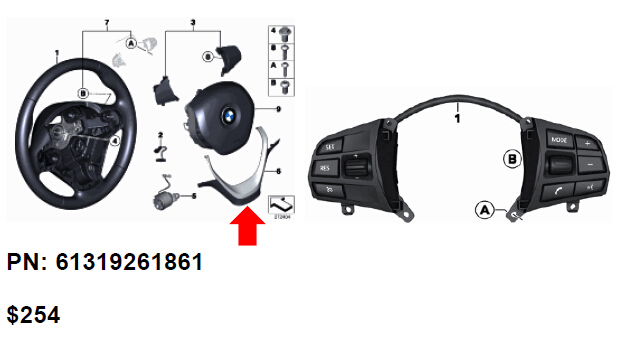
BMW OEM Multi steering-wheel switch
Note the different in the trim piece highlighted by red arrow.
Leather steering wheel

Sport leather steering wheel
Tools required:
1. Flat head screw driver
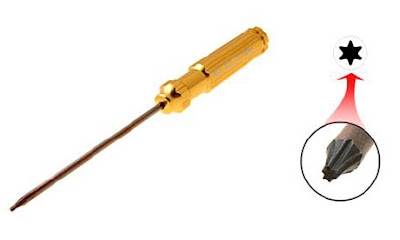
2. Torx screwdriver T10, T20
3. Computer with esys installed
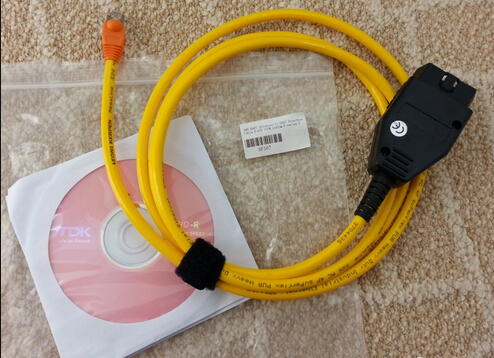
4. BMW ENET cable (Ethernet to OBDII) usb interface
This DIY will guide you on how to change/code the multifunction steering-wheel switch with cruise control function. The bimmer can be either F20/F30 series with automatic air condition.
Part required:
BMW OEM Multi steering-wheel switch
Note the different in the trim piece highlighted by red arrow.
Leather steering wheel

Sport leather steering wheel

Tools required:
1. Flat head screw driver
2. Torx screwdriver T10, T20

3. Computer with esys installed
4. BMW ENET cable (Ethernet to OBDII) usb interface
5. ESD strap

6. Wrench 10 mm
Installation Instruction for Multifunction Steering Wheel Swtich:
There are two ways to remove air bag. I recommend to remove air bag using the below method as it is easier plus it will not leave any mark on the steering wheel. The BMW method is in the appendix, if you desire to do that way. The toughest part of this DIY is getting the air bag out.
1. Disconnect negative battery terminal.
a. This will add safety from unintentional air bag deployment during removal.
Loosen nut (1).
Important!
Do not under any circumstances use force to pull off negative terminal.
Pull off battery earth lead with IBS in an upwards direction, place to one side and secure.

Important!
Do not under any circumstances use force to pull off negative terminal.
Pull off battery earth lead with IBS in an upwards direction, place to one side and secure.

b. Ground your body with car body with ESD strap (if you have one for extra protection)

2. Removing upper section of steering column shroud
Move steering column in "bottom" and "extended" position.
Pull steering column gap cover up carefully and clip out gap cover.

Pull steering column shroud (1) up.
Clip steering column gap cover (1) out of steering column shroud upper section.
Important!
Risk of damage!
Carefully pull steering column shroud upper section (1) upward at rear and clip out

3. Remove lower steering shroud
Press retaining lugs outwards a little and unclip steering column shroud downwards.
Installation note:
Align steering column shroud by means of retaining lugs to steering column and press up as far as it will go.
Press steering column shroud on both sides together a little and then press upwards completely until retaining lugs snap into place.
Check installation position, correct if necessary.

Tilt steering column shroud in downward direction.
If necessary, unlock plug connection (1) on steering column adjustment switch and (2) emergency starting aerial and disconnect.
Remove lower section of steering column shroud.

4. Turn steering 90 degrees to as illustrated below

5. Look back to the steering wheel from behind underneath steering column for the air bag hook as the picture below and use flat head screw driver to pry the hook and pull the air bag up on same side. Once the air bag is release continuing on the other side above the steering column to get the air bag release from both hooks. After remove airbag turns steering back to normal position.

6. Disconnect airbag and multifunction steering switch electrical connectors from the steering wheel.

7. Remove the air bag and put it in an open space with BMW logo facing up.

8. Use Torx screw driver to loosen two screws to release the multifunction steering switch and trim from steering wheels.
9. Use Torx screw driver to release multifunction steering switch from the trim pieces (4 screws) and replace with new multifunction steering switch. (Need to transfer one electrical connector from the old switch to the new multifunction switch.)

10. Reinstall trim piece to steering wheel and route the wire back to steering wheel.

11. Reconnect the connectors for multifunction switch and air bag and install air bag back by pushing it in until you hear a snap. Check to make sure that air bag is secured firmly.
12. Assemble back the steering column shroud and aerial.
13. Reinstall the steering gap cover.

14. Move steering column to the normal driving position.
15. Reconnect negative terminal.
16. Press start and check the followings:
a. Illumination lights on multifunction steering switch
b. Check the audio control
c. Press horn to check
d. Check for any fault from the instrument panel. Should be none!
17. Start coding
Coding:
Before you do this coding you must already know how to do coding, please search Google
on how to do or where to get the BMW ENET cable and E-sys software. I only let you know the step and ECU to do
FA coding
FA Coding:
1. Launch esys and connect to your car
2. Select expert mode
3. Read and activate FA (add option 544)
4. Read SVT
5. Select and code the following ECU
a. FEM
b. ICM
c. KOMBI

6. If you want “LIM” function, you will need to do FDL coding per the table below. This will
allow “SET” button to act like “LIM” button so that you get both LIM and Cruise control functions.

Testing:
1. Start the car and drive away
2. Once on an open road and the speed is greater than 30 km/h press button to turn on cruise control. The cruise indicator should be lit in the instrument cluster.

3. Press “Set” to set cruising speed then let go gas pedal, if the car can maintain the speed you all done.
4. Fine a bridge/slope and check whether the brake is applied when going down to maintain speed.
5. You all set! Consult owner manual for full detail of cruise operating procedure and precaution.
Appendix:
Removing and installing/replacing airbag unit

Warning!
Observe the following instructions to avoid any risk of injury by the airbag unit.
-Comply with safety regulations for handling components with gas generators.
-Do not exert any force on the airbag unit.
-Use only specified tools for releasing the airbag unit.
Note: Incorrect handling may result in triggering of the airbag unit and thereby cause serious injury
Necessary preliminary tasks:
Disconnect battery earth lead
Insert Torx screwdriver T20 (1) vertically into the concealed opening until limit position (2) can be felt.
Pull Torx screwdriver (1) approx. 2-3 mm out of opening. Press screwdriver handle towards middle of steering wheel and simultaneously slide into opening to position Torx screwdriver behind retaining spring bracket (refer to graphic below)

Press retaining spring bracket (1) of airbag unit inwards and simultaneously pull airbag unit upwards until it unlocks.
Repeat procedure on other side.
Installation note:
Snap airbag unit with uniform pressing force plane-parallel in direction of steering column shaft into steering wheel.
Warning!
Danger of injury!
The airbag unit may only be set down with the airbag itself facing up.

Tilt airbag unit forwards.
Disconnect plug connections (1) and remove airbag unit.
Installation note:
Make sure electrical leads are correctly positioned.


