11.02.2021

Retrofit BMW M3 Instrument Cluster with R270 Ncs Expert

This is a DIY guide that explains how one can retrofit another instrument cluster into their car. In this case, I was upgrading to an M3 cluster in my 128i, but all coding processes apply to retrofitting other 1'er clusters (135i cluster in a 128i, for example).

Important Notes:

I am using Windows 10 Home 64-bit on a Lenovo Legion gaming laptop. Nothing specialized here, computer-wise. A laptop is preferable since you'll need to do some in-car coding.

The donor instrument cluster MUST have fewer miles than your car in order to use this process.

I bought a cluster from a manual M3, and installed it into a manual 128i. Please do not ask how to install in an automatic, because, I have no idea. I'd assume the process is much the same (it's probably exactly the same, since NCS Expert really does all the footwork for you).

All software below is what I used, and had success with. It's reasonable to assume that it'll work for you, too. If it doesn't, google is a wonderful tool that fixes issues for lots of people (myself included).

You should have a basic understanding of NCS Expert and how it works.

Materials for Coding the New-to-You Cluster:
-R270+ Programmer (like this one)
-SOIC8 Testing Clip (like this one)
-Used Instrument Cluster (This process requires that it has less miles than your car; easy for me, with 196k miles when shopping for M3 parts)
-T10 Torx screwdriver (only necessary for M3 clusters)
-Install R270 Programmer Software (this download is clean, I wouldn't recommend using the disc included with the programmer, RUN SETUP.EXE to install)
-Install HxD hex editor (here)
-Mike's Easy BMW Tools (this is what works for me)
-K-DCAN Cable (this one works for me)

Preparing for Coding:

Make sure all the necessary software has been installed, and that the programs launch correctly. Test the BMW tools by launching INPA and verifying that it's connected.

You'll first need to open-up your new instrument cluster. On the M3 clusters, there are four silver T10 screws on the back that you'll need to loosen before attempting to hulk the thing apart. After those screws are out, work your way around the cluster, popping each of the 6 retainers (2 top, 2 bottom, 1 each side) and slowly pull the two halves apart.

Now, you need to pop the gauge needles off. For this, I recommend cutting out a four-inch square piece of paper, and then cutting a ~2mm-wide slot, about 2 inches long, starting mid-way on one of the sides and going to the center of the square of paper. Now, fit this square of paper underneath the needles, and above the gauge dial. The slot is supposed to let you slide the piece of paper underneath both needles (speedo and fuel, or tach and oil temp) and around their pins so that it protects the dial (they scratch easily). To pop the needles off, I recommend a very thin fork that'll fit around the pins. Just work it under the needles, and gently pry upwards. Shoot for the most vertical motion possible, with as little twisting as possible. If you snap the pins that hold the needles, you pretty much have to scrap that cluster. In a pinch, a thin, flat-blade screwdriver works just fine. Set the needles aside in a safe place after you're done playing with them (we all do it).

This is a tricky one to explain, but here it goes: You now need to flip the cluster over to the black plastic side. You will see a rectangular 18-pin connector (it's the only connector, but I'm trying to be detailed). You need to push downwards on that connector (towards the bottom of the cluster assembly) push it out so that the white plastic part pops out a little, then press the opposite direction on the side that didn't pop out, and kinda wiggle the thing apart. The end result will be a large piece of black plastic, and then the white plastic part with the now exposed backside of the circuit board.

Now, separate the white plastic from the circuitry by releasing four little clips (2 on top, 2 on bottom). For 1-series clusters, you will need to also detach the ribbon cable attached to the LCD panel. Simply disconnect it from the long white connector at the bottom of the circuit board. Now, you can clearly see the brains that make your instrument cluster tick, there's far more going on than you'd think, a far cry from old cars (which makes our jobs super easy).

You are now ready to do the first part of coding.

Clearing Old VIN from EEPROM:

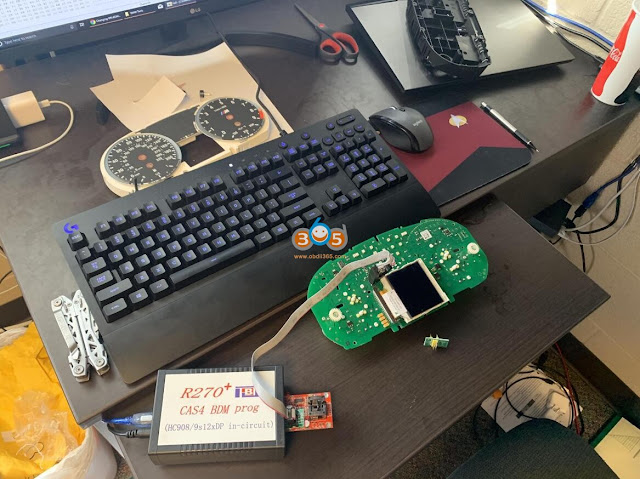
Pull out your R270+ and your SOIC8 test clip. Find your EEPROM. It is an 8-pin chip (four on a side). On the M3 cluster, it is just above the left corner of the LCD display (as shown in the huge picture below). The clip I used (link above), has a pink wire denoting Pin 8. If you look at the text on the EEPROM, correct side up, Pin 8 is on the bottom left of the chip.
Ensure everything is plugged-in and connected. Launch the R270 programmer application, select which chip it is (printed on EEPROM). All three clusters I've seen had 080D0WQ chips, but verify yours because they can be different. Hit "Read" ignore the obnoxious beeps from the programmer box, and save the .BIN file to your desktop (you can save it anywhere, really). Now, close the R270 program, and open HxD. Open the .BIN file. Scroll down to the -2E0 line, and highlight all data in that line, and replace it with FF's. Line -2E0 should read "FF FF FF FF FF FF FF FF FF FF FF FF FF FF FF FF" when done (you could copy that and paste it into HxD, too). Save the .BIN file, close HxD, and open the R270 app again. Load the .BIN file, then verify the selected chip, and hit write. This process will take about a minute, and there will be lots of beeping.
Retrofit BMW M3 Instrument Cluster with R270  1
The programmer comes with just the red board. The clip comes with two adapters, I used the black one with the keyed connector for the clip itself and simply inserted it into the pin holes next to the ZIF socket. (Pic attached)
Retrofit BMW M3 Instrument Cluster with R270  2

Retrofit BMW M3 Instrument Cluster with R270 3
Once finished, you are done with this part of the install. Disconnect the programmer, and, minus the needles and front cover (part with clear plastic), reassemble the cluster. You should ONLY have the back black plastic part, circuit board, and white plastic part put together.

Coding Cluster to Car with NCS Expert:

After you're done being extremely happy that you did a computer thing, go out to your car with your half-cluster and your needles.

I would disconnect the negative battery lead for this part.

Remove your original cluster, there are two torx (T15??) screws at the top of the hood. Remove those, then use a thin flat-blade screwdriver to push the top of the cluster downwards, then pull the cluster out. Undo the connector on the back (there's a latch mechanism, so be aware of that).

Now, connect your new-to-you cluster, and THEN reconnect the battery, if you disconnected it.

Open your computer, turn the ignition on (door closed, engine not running, climate control unit should turn on). Connect your K-DCAN cable and verify communication with INPA. Open NCS Expert, load "Default profile" (Mike's Tools). Hit "VIN/ZCS/FA" then hit "ZCS/FZ f. ECU" and select "E89" for chassis, then "CAS" for module. Give it a second to fill VIN and VO fields. Hit "Back" then hit "Process ECU" select "KOMBI" and hit ok. "Change job" to "SG_CODIEREN" and the "execute job." It will take a couple seconds and there will be beeping and weird noises. Once done, your new cluster is coded to your car's VIN, and will not show any errors for things your car doesn't have.
9.14.2021

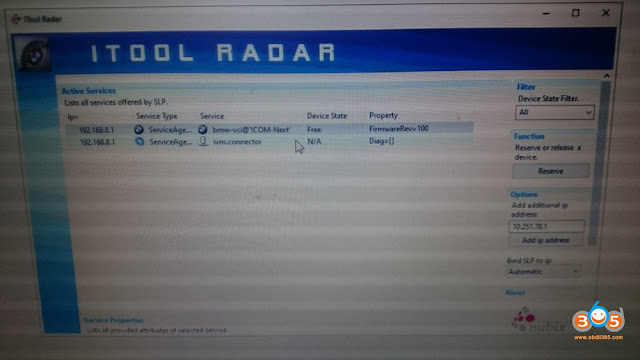
How to Solve ICOM Next cannot detect by Itool Radar?

 Problem: I have a BMW ICOM Next. I upgraded firmware for it. Now it cannot be find by itool radar software. I tried restore using USB flash method. However when I reset Icom by press and hold the pin hole near USB port, but does not happen on my Icom Next.

Solve ICOM Next cannot detect by Itool Radar 1

Solve ICOM Next cannot detect by Itool Radar 2

Solve ICOM Next cannot detect by Itool Radar 33

How to restore this Icom Next?

SOLVED by re-injecting via USB key files : “USER.settings” and “user.settings.log”  (can find in “Restore ICOM.7z” in ISTA installation package)
ICOM IP address was lost and now all OK !!!!


Credit to @ nono93


Any problem with BMW ICOM Next software, contact at www.obdii365.com.

9.07.2021

Fix BMW ISTA+ "Display" Function isn’t working?

 Problem: BMW ISTA+ “Display” Function isn’t working, files were downloaded from forum, all files were extracted and unblocked. Car can be identified and fault tree is shown. Everything works fine, but when I create a test plan for faults and click ‘display’, the next page is blank and ends up semi-freezing the program.


How to fix BMW ISTA+ “Display” Function is blank?

To do a fresh installation again,

Disconnect from internet,

Stop antivirus programs, windows defender or any software that may block files,

Use 7zip to extract all files then try again.

Follow the installation guide, pay attention to windows software like .net framework 3.0,3.5,4.0,4.5, VC++ all versions starting from 2003 up to at least 2015 x86 and 64 bit, and java.


You asked for the sitting for the Ediabas folder in Rheingold folder ediabas.ini , interface, it should be set to “REMOTE” not “STD:OBD”, as I am also using a INPA K+DCAN not an ICOM. Interface = STD:OBD must be set in the C: Ediabas folder only.

I am not sure if this has something to do with the screen freezing problem but I think it is worth to say.


For flashing: INPA should work and connection to the car verified that also will start the server, close INPA and start winkfp providing you installed spdaten properly.


PS: It is always recommended to install BMW software on a fresh copy of windows.


Alright, if you bought any of INPA K+DCAN or BMW ICOM from obdii365.com, remote assistance is available if any problem.


Read also:

How to configure BMW ICOM ISTA+ on INPA K+DCAN cable?

8.16.2021

How to Choose BMW ICOM Next Clone?

 Main benefits of an ICOM from our perspective:

1. Wireless diagnosis connection
2. Ease of use in a shop with multiple active connections
3. Self-hosted DHCP server for ethernet programming


There are several ICOM Next clone multiplexers available in obdii365.com, which one of them is the best?

SP269Out of production
SP269-1ICOM Next from a different manufacturer
SP269-B (SP269-BS)ICOM Next from a different manufacturer
SP269-B1 (SP269-B1S)Best quality ICOM Next clone. clone from original ICOM Next, best chip. fiber programming, faster speed, support older vehicle pre-2000. can do motorcycle as well.
SP269-C (SP269-C1)ICOM Next from a different manufacturer, cheaper, out of production.
SP269-DICOM Next using VXDIAG Solution, based on VX Manager driver, cheapest ICOM Next


All other ICOM Next clones are discontinued due to lack of chips.  Only SP269-B1 (and its software package) and SP269-D (its software package) are available.

Both have WiFi connection.

Both firmware can be updated.


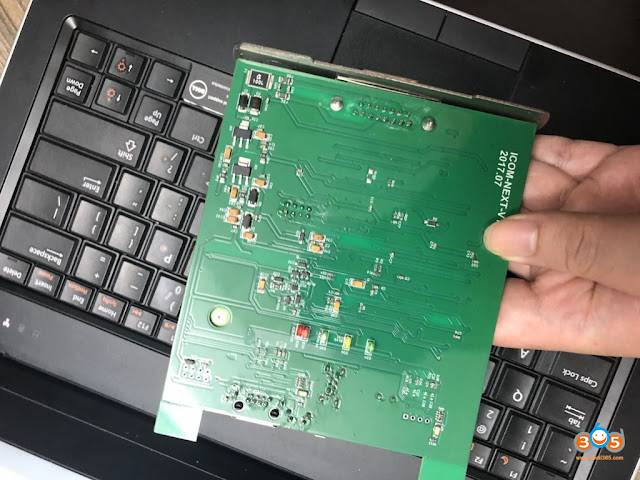
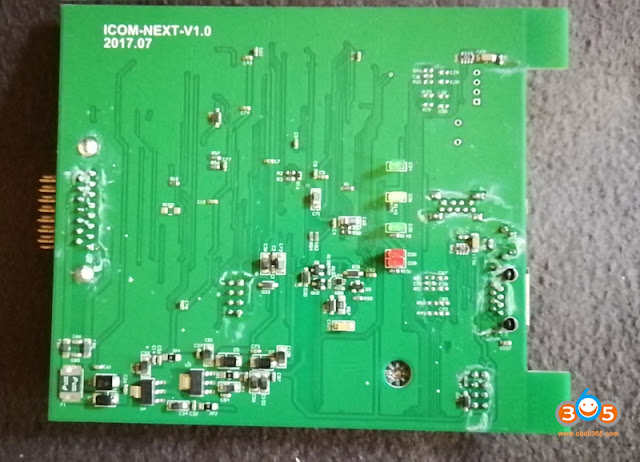
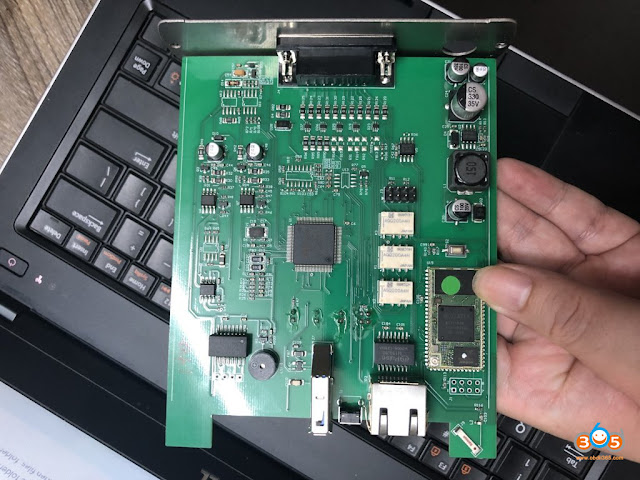
ICOM Next clone SP269-B1 PCB

Price: $349 – $399

ICOM Next clone SP269-B1 PCB 1

  ICOM Next clone SP269-B1 PCB 2

ICOM Next clone SP269-B1 PCB 3


 ICOM Next clone SP269-B1 PCB 4


Some positive reviews:

1.

ICOM Next is faster than the old bmw icom. It is also better built IMHO.
And Next is WIFI available also.
It handles multiprogramming and coding quite nicely.
Gets the job done much faster if flashing the complete vehicle.
Another benefit to Next will be compatibility for future cars.


2.

I have icom next clone it works perfectly didn’t faced any issues.


3.

My Chinese NEXT is working for more than year and everything is OK so far. I paid much more for it , but ye you get what you paid for.


4.

It’s very good, the only thing you have to know it is the caps for usb enet etc, they won’t be really helpful bc they open all the time, However the quality is very good, enet cable is very long, OBD cable is very durable. Like it so much.


5.

My old icom A2 burned with long hours connectied by accident.But this ICOM Next seems to work well with a Heat dissipation


6.

Wifi connection is strong and stable, also the lan cable is work fine, 10 meters long enough. It is easy to make programming transmission control module EGS of BMW.


ICOM Next clone SP269-D

The advantage of this icom next is that the VX Manager can detect the device connection status.  And it is much cheaper then SP269-B1.  If you do want to keep it, then have a read on that website from where you downloaded VX Manager, you need to run other software before it will EMULATE an ICOM.

It takes $269 only with HDD.

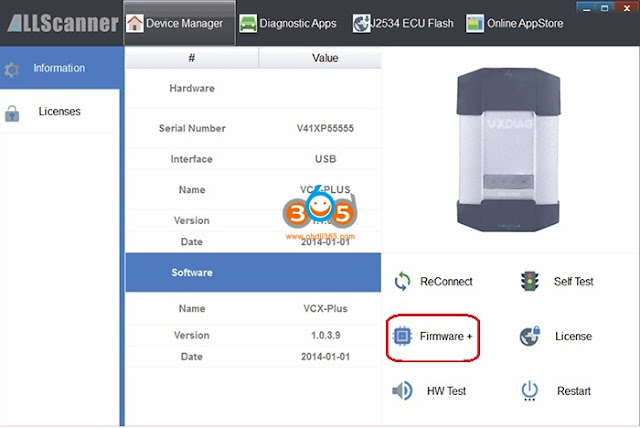
ICOM Next clone SP269-D 1

ICOM Next clone SP269-D 2

For those with the Icom Next clone with VCXDoIP:

It’s a very powerful tool that can emulate all sorts of diag hardware for BMW, VAG, GM, BENZ, Porsche…

No need for DHCP server or router, it’s build in.

– Firmware update 1.49 is available via VXManager.

– For connection with ista-p you need to download BMW ptt driver from VXDiag, start Pass-Thru app in VXManager and emulate by loading dll. Make sure its set to SAEJ2534

– For connection with ista-d you need to set connect via icom/ethernet local network in ista settings.
If your license is valid you can also use cloud software

– For connection E-sys sometimes ZGW is not detected on first try, select connect via icom/ethernet tcp://<icom ip adress>:50160 than close connection. Now ZGW is available and connection can be made via vin or gateway url.

ICOM Next clone SP269-D

How to Update ICOM Next clone firmware SP269-D?


The ICOM Next choice would be Original ICOM Next > ICOM Next SP269-B1 > ICOM Next SP269-D


Read also: How to configure BMW ICOM Next WiFi?


www.obdii365.com

7.19.2021

BMW ICOM Next IP Problem Solution

 Got BMW ICOM NEXT not connecting to ISTA because it need firmware update I try to login with internet explorer but I didn’t get the setup page. I don’t know if it’s IP problem or what.

bmw-icom-next-ip-problem-1

Here is the itool radar shot:

bmw-icom-next-ip-problem-2

Advice:

Try that: 192.168.8.1:60080
LOG IN with following:
Username: root
Password: NZY11502  or NZY1150263


Download iTool Radar, connect the ICOM directly to your computer, and it should read the ip address from the ICOM.  Once you have the IP address, then you can proceed to log onto it using chrome or microsoft explorer browser with the provided credentials above.


If you did exactly as above, but with no luck. Then make an restore usb and reflash with this!

Download from this mega: BMW_ISPI_ICOM_NEXT_FW_3.15.03_files.txt

https://mega.nz/#!UJRllQRK!UIBddM2M8dXo2D5yf8Seluz-TuHiU4yCdnjvLiZOP8A


Then create a restore USB by following the following instructions:

A portable USB mass storage device (USB stick) that is at least compliant with USB 2.0 and is formatted with the FAT32 file system is required as additional hardware.

1. Create a text file user.settings with the following content: ConnectionMode=xxxxxx * 1 (default *2 : DHCP) Ip=xxx.xxx.xxx.xxx (default: 0.0.0.0)
Netmask= xxx.xxx.xxx.xxx (default: 0.0.0.0)
Gateway=xxx.xxx.xxx.xxx (default: 0.0.0.0)

Pay attention to the upper and lower case letters!

* 1 Possible parameters for ConnectionMode: STATIC_IP, DHCP, APIPA * 2 default = factory settings

2. Copy the file user.settings onto the USB stick.
3. If the ICOM NEXT A is ready for operation (SYSTEM LED permanently lights up green), the USB stick is to be connected to the unit (a connected MOST diagnosis adapter is to be unplugged). The red light chain starts after approx. 10 seconds (see 4.2.7.).

The saved settings are persistently overwritten. The green light chain starts once all the data has been updated. In this state, the unit can be addressed at the new IP (even without a restart). If the red light chain does not start, the user.settings file on the USB stick could not be read. If the green light stays off, an error has occurred while the LAN configuration was being written. For analysis purposes, the ICOM NEXT A saves the file user.settings.log with the error description to the USB stick.


or possibly as follows after that you copy the necessary files:

1.3. Connect the USB stick to the ICOM Next.


1.4. Press and hold the button located on the right-hand side of the ICOM Next, next to the OBD II cable connection socket.


1.5. Continue to hold the button, connect the device to the vehicle’s OBD II jack and keep the button pressed until the LEDs on the ICOM Next glow red.


1.6. Release the button and within five seconds, push the button three times. This starts the firmware update.


Note: The update may take several minutes. Do not disconnect the ICOM Next as long as any LED glows red.


1.7. When all LEDs on the ICOM Next have stopped glowing, the Emergency Firmware Update is complete. You can now disconnect the USB flash drive.

1.8. IMPORTANT: When the Emergency Firmware Update is finished, the ICOM Next must be connected to your network with a LAN cable in order to be reconfigured since all previous settings have been lost. If there is a “user.settings” file on the USB flash drive, it will be installed after the firmware update.


Final update:

This login is for original next or clone/orig A1, A2 for sure.

I try to login to ip: 192.168.8.1

LOG IN with following:

Username: root

Password: NZY1150263


Hope it helps!


Best source of BMW ICOM Next:

https://www.obdii365.com/wholesale/wifi-bmw-icom-next-a-b-c-with-laptop-lenovo-x220-plus-software-hdd.html

7.14.2021

How to clear/reset DME or EGS Adaptations using INPA

 How to Reset Adaptations


This describes how to clear/reset DME or EGS adaptations using INPA.
Be sure key is in position 2 with engine OFF.

MS43
  • E46
  • Engine
  • MS43
  • F4 Error
  • F7 Reset adaptions
  • F8 adaption Variants clearing
MS45.1
  • E46
  • Engine
  • MS45
  • F8 adaption
  • F9 All
GS20, GS8.60.2, GS8.60.4
  • E46
  • Transmission
  • GS20
  • F6 Activate
  • F3 Reset adaption values

How to flash a BMW DME or EGS with WinKFP?

Here is the guide to set up and flash a DME or EGS. Look at the steps starting at "Open up WinKFP" below.

- Install BMW Standard Tools 2.12 (EDIBAS, INPA, WinKFP, NCS Expert) and ensure they work with your car.
- WinKFP 5.1.6 (no earlier version than this)
- INPA 5 or higher
- Get the daten files (download, extract from Progman or Ista/p).
- E39 daten files: https://rapidshare.com/files/1672164095/E39_V41_Daten_Files.rar
- E46 daten files: https://rapidshare.com/files/4196534502/E46_V41_Daten_Files.rar
- See these instructions for extracting the daten files from Ista/p.
http://forums.bimmerforums.com/forum/showthread.php?1590483-I-need-files-to-work-with-WinKPF-help-me

- Have jumper cables to another car battery supplying a minimum of 10A power.
- Connect the K-line cable to OBD port on car and USB port on computer.
- Turn the ignition key to position 2.
- Open up WinKFP.
- Select Configuration
- Uncheck Fast baudrate.
- To not increment the flash update counter, uncheck all UIF checkboxes.
- Click OK, cancel all the prompts about creating the new config files, click Ok to save to INI file.
- Select F1 Comfort Mode.
- Select F3 Update ZUSB.
- Select the ECU to update (ex: GD20, GD8604, MDS43, MDS451, etc.).
- Select F4 Enter VIN and paste in the full VIN for the car.
- Select F8 Done.
- Select F3 Prog. ZB-Update to detect current version and latest available update version.
- Click OK to begin flashing.
- It takes 43 minutes for MS45.1, 20 minutes for MS43, 7 minutes for GD20, 12 minutes for GD8604).
- After the confirmation message of flash update complete, close WinKFP.
- Wait one minute.
- Turn off the ignition key.
- Wait one minute.
- Turn on the ignition key to position 2.
- Clear adaptations using either INPA or PA Soft 1.4:
- Start INPA, select DME, Errors, Adaptations.
- Start PA Soft 1.4, select Units, select DME/DDE, select called "DME-EWS Adaptations".
- Clear any error codes in both DME and EGS. Turn off key for one minute. Try again. Do this until all are cleared.

7.12.2021

Program BMW Single ECU with Icom ISTA+ or Esys

 Problem:

there is a car 2020 year model, X750i . I want to program right Headlight only with Icom ISTA+ but there is I couldn't find single ecu programming option, 

Software is calculating for many control unit update, 

Im new with Icom, Is there any way to do it, Im a bit afraid to do full programming as its time consuming and may cause something wrong with other ECU's.

Program BMW Single ECU with Icom

It’s better to program a single ECU using ESYS and ENET cable. Ista cant program one module. Esys is much safer and is faster. ISTA does not allow for “Expert” mode for single ECU flashing. All G-Series car are safe to flash using ENET and ESys.

7.01.2021

How to restore ICOM Next when all LEDs turn red?

 Problem with BMW ICOM Next: did an update on my motorcycle and everything went fine and today when I connect icom to OBD – all leds are just on with red color, system one is blinking red/yellow.


Please do exactly as follow:

  1. Disconnect the ICOM Next device from the power supply or vehicle.
    2. Go to the directory

C:\ProgramData\BMW\ISPI\data\TRIC\ICOMNext\ICOM-Image-xx-yy-zz.
Note: This directory is hidden. Please see [?00045002EN].
2.1. Copy the file ICOM_Next-rootfs-xxxxxx.tar.gz to the root directory of the USB flash drive.
2.2. Copy the file ICOM_Next-app-yyyyyy.tar.gz to the root directory of the USB flash drive.

Note:
– An ICOM_Restore.bin file is not available. Please use the files from the ICOM Next firmware package as described above.
– xxxxxx and yyyyyy in the file names represent the version numbers of the respective files.
– If the directory contains more than one ICOM-Image-xx-yy-zz folder, please choose the most recent one, i.e. the folder with highest number. The ICOM Next will then be ready to use without further updates.
– It is important that the files are copied to the root directory of the USB flash drive.

3. Connect the USB stick to the ICOM Next.
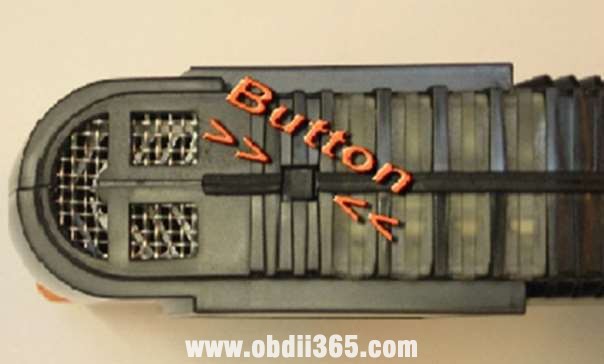
4. Press and hold the button located on the right-hand side of the ICOM Next, next to the OBD II cable connection socket.
5. Continue to hold the button, connect the device to the vehicle’s OBD II jack and keep the button pressed until the LEDs on the ICOM Next glow red.
6. Release the button and within five seconds, push the button three times. This starts the firmware update.
Note: The update may take several minutes. Do not disconnect the ICOM Next as long as any LED glows red.
7. When all LEDs on the ICOM Next have stopped glowing, the Emergency Firmware Update is complete. You can now disconnect the USB flash drive.
8. IMPORTANT: When the Emergency Firmware Update is finished, the ICOM Next must be connected to your network with a LAN cable in order to be reconfigured since all previous settings have been lost. If there is a “user.settings” file on the USB flash drive, it will be installed after the firmware update.


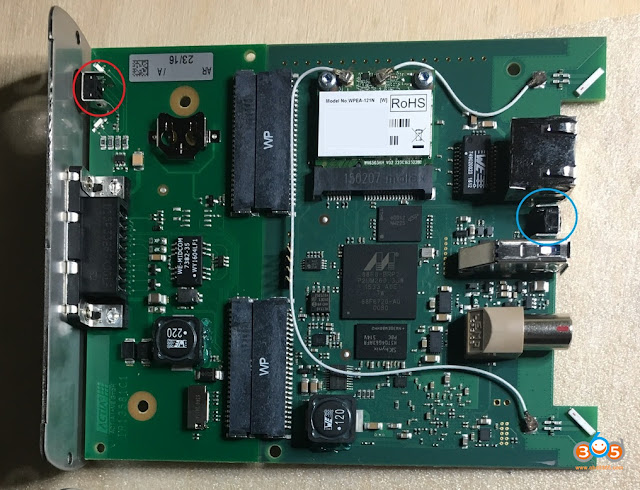
The RIGHT reset button on Original ICOM Next the button behind the tiny black hole! (in red circle).

restore-icom-next-1


WARNING!

Not Orig ICOM NEXT has another reset button!!!!
The red circle is a NON OEM ICOM NEXT reset button, and the blue is the OEM ICOM NEXT reset button!!!!!

restore-icom-next-2


And there is one original ICOM NEXT PCB where a reset button in the blue circle! (NOT THE RED!!!)

restore-icom-next3


Question: what icom_restore.bin is doing?

Answer: The existing restore.bin is for ICOM A or A2!


And here is one user’s success feedback: Yesterday out of a blue my ICOM Next OEM has stopped to work, ethernet can’t find IP address. In about 2 minutes ICOM was recovered and connected to the ethernet network. PS: He follow the above ICOM Next store procedure.


Best source of BMW ICOM NEXT:

https://www.obdii365.com/producttags/2021.06-bmw-icom-next.html

6.15.2021

BMW ICOM A2 LAN Not Working After Reset Factory Setting

 Problem:

How to restore BMW icom a2 after a factory reset? LAN doesn’t work after reset.


Answer:

You need to restore it with usb drive, here is the file you need and how to do it…… first restore then update …. you should search what is the last version of ista that support F


https://mega.nz/file/tBYzVSBY#imbaH6NeLbV7n7dutVb3BMXYMGLVw0Ear-HqTXUUZTs

icom_01_37_00 .rar

23.2 MB


  1. Update firmware BMW ICOM A1-A2-A3 (The next paragraph will list the details)


  1. BMW ICOM A1-A2-A3 Factory Restore (The last paragraph will list the details)


Step-by-step procedure on BMW ICOM A1-A2-A3 Factory Restore

Perform a factory reset if you face one of the following issues:

 -Single ICOM with at least one green LED, but does not become visible in ISTA

- Single ICOM with at least one green LED, but it is not available in Connection Manager and

therefore cannot be reserved

- Single ICOM is not working in WLAN

 -Single ICOM with at least one green LED, but Firmware Update is not possible neither via

ISTA nor via ICOM Web GUI


Prerequisites:

 -USB flash drive. 2.0 with a minimum of 60 MB free space formatted with FAT32 (e.g. by

Microsoft Windows)

- “ICOM_Restore.bin” file, which can be downloaded from this page. Make sure you always

use the latest file for the factory reset


Fix: Perform the following steps:

  1. Copy the “ICOM_Restore.bin” file to the USB flash drive
  2. Disconnect the network cable from ICOM A
  3. If ICOM A is placed in an OBD II jack of the vehicle, then pull it out (ICOM A must have status off”)
  4. Connect the USB flash drive to ICOM A
  5. This step has to be done in a maximum time of 5 sec or the update process will not start:

 Press the reset button on the ICOM A and hold it pressed:

reset-icom-after-factory-reset-1

Connect ICOM A to the OBD II jack while the button is pressed (all LED will become red)

 Release the reset button and then press it 3 times

 The LEDs will flash red (if not, repeat the above steps)

 The process is finished after 3 minutes

 When the system LED is shining green, the update process is finished successfully

 Disconnect to USB flash drive

  1. Factory reset is done
  2. Disconnect the ICOM A
  3. Connect the LAN cable between the ICOM A and the network
  4. Connect the ICOM A to a vehicle or external power supply
  5. ICOM becomes visible now again in ISTA / work correctly again


Step-by-step procedure on BMW ICOM Upgrade:

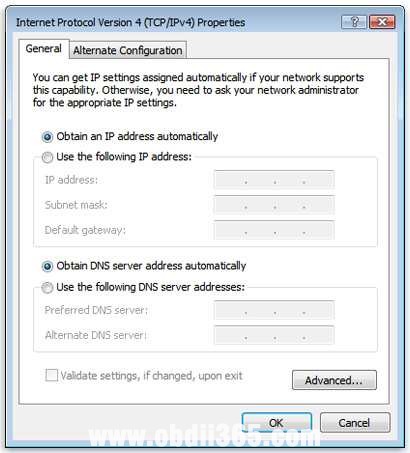
  1. First step is to make sure the LAN adapter is set to DHCP and is enabled, here is how to do

it:

  • Open Network Connections by clicking the Start button, and then clicking Control Panel.

In the search box, type adapter, and then, under Network and Sharing Center, click View

network connections.

  • Right-click the connection that you want to change, and then click Properties. If you’re

prompted for an administrator password or confirmation, type the password or provide

confirmation.

  • Click the Networking tab. Under This connection uses the following items, click either

Internet Protocol Version 4 (TCP/IPv4) or Internet Protocol Version 6 (TCP/IPv6), and then

click Properties.

reset-icom-after-factory-reset-2


The Network Connection Properties dialog box

  • To get IP settings automatically using DHCP, click Obtain an IP address automatically,

and then click OK.

  • To get a DNS server address automatically using DHCP, click Obtain DNS server

address automatically, and then click OK.

reset-icom-after-factory-reset-3


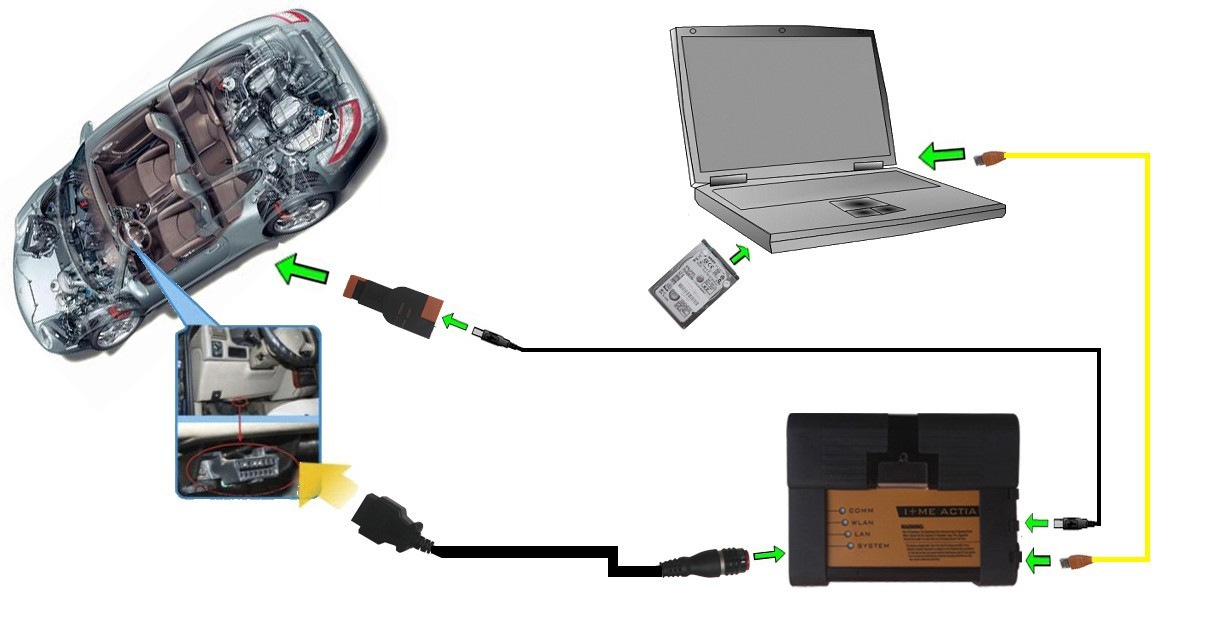
  1. Connect ICOM to the car and to the UTP cable provided in the package

– there should be 4 green leds powered on

  1. Check that the network adapter has an IP like 169.254….
  2. Using the web browser go to http://169.254.92.38:60080

User: root Password: NZY1150263

reset-icom-after-factory-reset-4

  1. Select channels menu and click only once on the button available there:

reset-icom-after-factory-reset-5


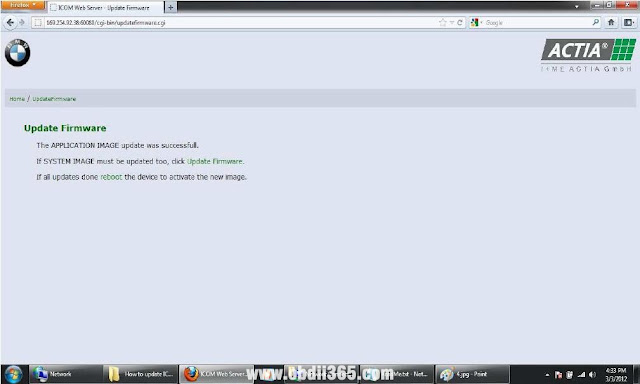
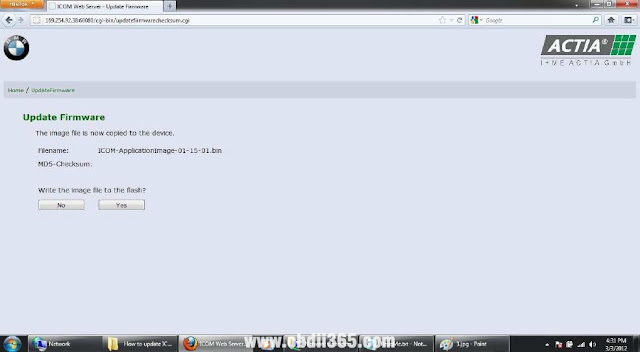
  1. Go to firmware update and update with ICOM-BootImage-01-11-01.bin, then with ICOMApplicationImage-

01-15-01.bin, don’t reboot between parts:

– at the image type we have selected System, now Browse for the ICOM-BootImage-01-11-01.bin and

click on “Send the file” button and wait

reset-icom-after-factory-reset-6


– click on Yes and wait

reset-icom-after-factory-reset-7


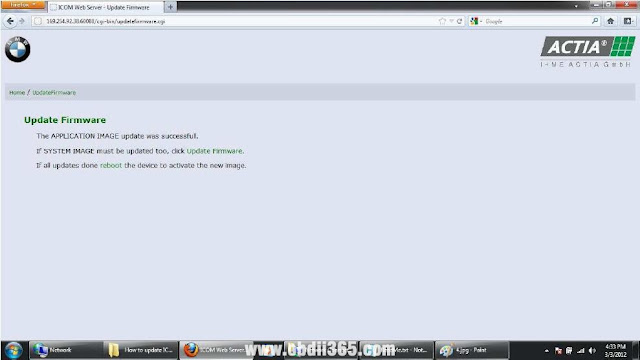
-now click on Update Firmware to go and update with ICOM-ApplicationImage-01-15-01.bin

reset-icom-after-factory-reset-8


– at Image type check the option called APPLICATION and Browse for ICOM-ApplicationImage-01-15-

01.bin and click on “Send the file” button and wait

reset-icom-after-factory-reset-9


– click on Yes and wait

reset-icom-after-factory-reset-10


  1. Reboot ICOM

reset-icom-after-factory-reset-11

reset-icom-after-factory-reset-12

  1. After at least 2 minutes press on Home button and go to Update Firmware and check to see

the firmware versions for boot is 1.11.01 and application is 1.15.01:

reset-icom-after-factory-reset-13

Alright, hope it helps!


FYI, this link includes all BMW ICOM NEXT source:

https://www.obdii365.com/producttags/bmw-icom-next.html


http://blog.obdii365.com/2021/06/16/restore-bmw-icom-a2-after-factory-reset/