7.19.2021

BMW ICOM Next IP Problem Solution

 Got BMW ICOM NEXT not connecting to ISTA because it need firmware update I try to login with internet explorer but I didn’t get the setup page. I don’t know if it’s IP problem or what.

bmw-icom-next-ip-problem-1

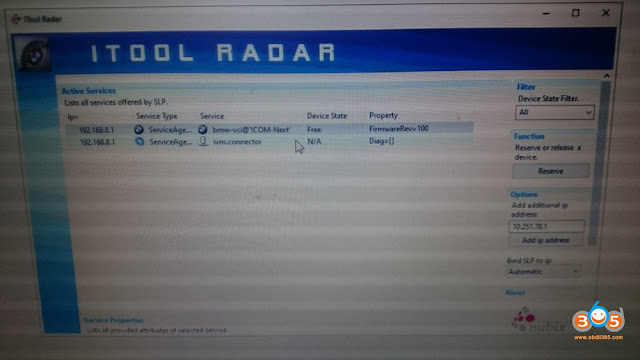
Here is the itool radar shot:

bmw-icom-next-ip-problem-2

Advice:

Try that: 192.168.8.1:60080
LOG IN with following:
Username: root
Password: NZY11502  or NZY1150263


Download iTool Radar, connect the ICOM directly to your computer, and it should read the ip address from the ICOM.  Once you have the IP address, then you can proceed to log onto it using chrome or microsoft explorer browser with the provided credentials above.


If you did exactly as above, but with no luck. Then make an restore usb and reflash with this!

Download from this mega: BMW_ISPI_ICOM_NEXT_FW_3.15.03_files.txt

https://mega.nz/#!UJRllQRK!UIBddM2M8dXo2D5yf8Seluz-TuHiU4yCdnjvLiZOP8A


Then create a restore USB by following the following instructions:

A portable USB mass storage device (USB stick) that is at least compliant with USB 2.0 and is formatted with the FAT32 file system is required as additional hardware.

1. Create a text file user.settings with the following content: ConnectionMode=xxxxxx * 1 (default *2 : DHCP) Ip=xxx.xxx.xxx.xxx (default: 0.0.0.0)
Netmask= xxx.xxx.xxx.xxx (default: 0.0.0.0)
Gateway=xxx.xxx.xxx.xxx (default: 0.0.0.0)

Pay attention to the upper and lower case letters!

* 1 Possible parameters for ConnectionMode: STATIC_IP, DHCP, APIPA * 2 default = factory settings

2. Copy the file user.settings onto the USB stick.
3. If the ICOM NEXT A is ready for operation (SYSTEM LED permanently lights up green), the USB stick is to be connected to the unit (a connected MOST diagnosis adapter is to be unplugged). The red light chain starts after approx. 10 seconds (see 4.2.7.).

The saved settings are persistently overwritten. The green light chain starts once all the data has been updated. In this state, the unit can be addressed at the new IP (even without a restart). If the red light chain does not start, the user.settings file on the USB stick could not be read. If the green light stays off, an error has occurred while the LAN configuration was being written. For analysis purposes, the ICOM NEXT A saves the file user.settings.log with the error description to the USB stick.


or possibly as follows after that you copy the necessary files:

1.3. Connect the USB stick to the ICOM Next.


1.4. Press and hold the button located on the right-hand side of the ICOM Next, next to the OBD II cable connection socket.


1.5. Continue to hold the button, connect the device to the vehicle’s OBD II jack and keep the button pressed until the LEDs on the ICOM Next glow red.


1.6. Release the button and within five seconds, push the button three times. This starts the firmware update.


Note: The update may take several minutes. Do not disconnect the ICOM Next as long as any LED glows red.


1.7. When all LEDs on the ICOM Next have stopped glowing, the Emergency Firmware Update is complete. You can now disconnect the USB flash drive.

1.8. IMPORTANT: When the Emergency Firmware Update is finished, the ICOM Next must be connected to your network with a LAN cable in order to be reconfigured since all previous settings have been lost. If there is a “user.settings” file on the USB flash drive, it will be installed after the firmware update.


Final update:

This login is for original next or clone/orig A1, A2 for sure.

I try to login to ip: 192.168.8.1

LOG IN with following:

Username: root

Password: NZY1150263


Hope it helps!


Best source of BMW ICOM Next:
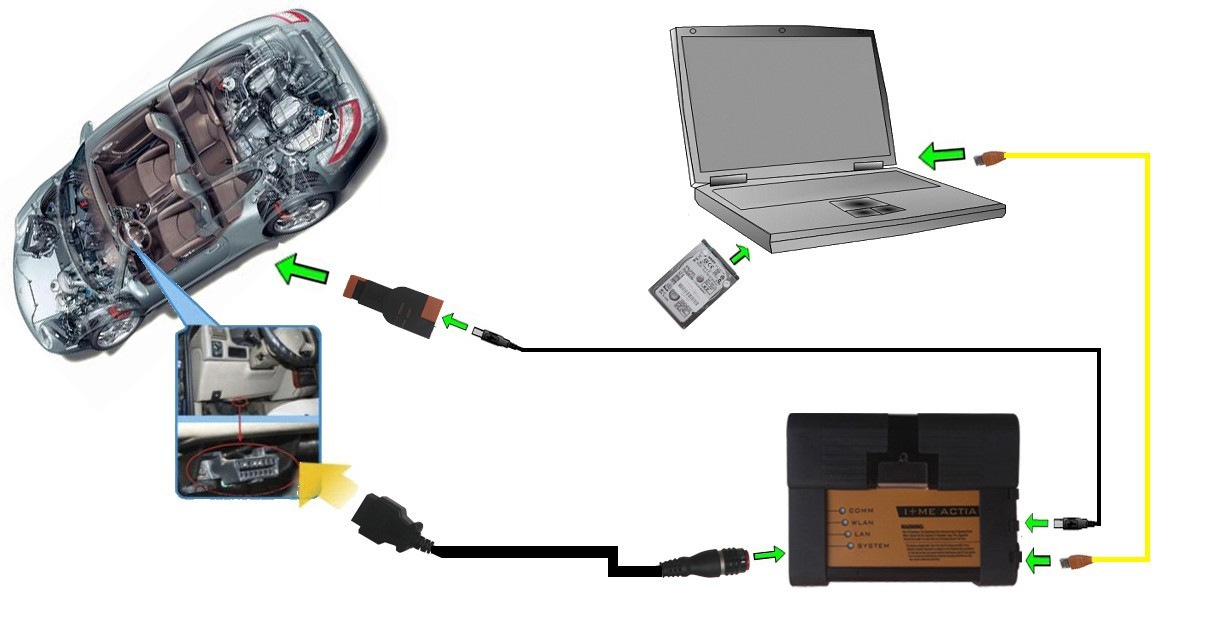
https://www.obdii365.com/wholesale/wifi-bmw-icom-next-a-b-c-with-laptop-lenovo-x220-plus-software-hdd.html

7.14.2021

How to clear/reset DME or EGS Adaptations using INPA

 How to Reset Adaptations


This describes how to clear/reset DME or EGS adaptations using INPA.
Be sure key is in position 2 with engine OFF.

MS43
  • E46
  • Engine
  • MS43
  • F4 Error
  • F7 Reset adaptions
  • F8 adaption Variants clearing
MS45.1
  • E46
  • Engine
  • MS45
  • F8 adaption
  • F9 All
GS20, GS8.60.2, GS8.60.4
  • E46
  • Transmission
  • GS20
  • F6 Activate
  • F3 Reset adaption values

How to flash a BMW DME or EGS with WinKFP?

Here is the guide to set up and flash a DME or EGS. Look at the steps starting at "Open up WinKFP" below.

- Install BMW Standard Tools 2.12 (EDIBAS, INPA, WinKFP, NCS Expert) and ensure they work with your car.
- WinKFP 5.1.6 (no earlier version than this)
- INPA 5 or higher
- Get the daten files (download, extract from Progman or Ista/p).
- E39 daten files: https://rapidshare.com/files/1672164095/E39_V41_Daten_Files.rar
- E46 daten files: https://rapidshare.com/files/4196534502/E46_V41_Daten_Files.rar
- See these instructions for extracting the daten files from Ista/p.
http://forums.bimmerforums.com/forum/showthread.php?1590483-I-need-files-to-work-with-WinKPF-help-me

- Have jumper cables to another car battery supplying a minimum of 10A power.
- Connect the K-line cable to OBD port on car and USB port on computer.
- Turn the ignition key to position 2.
- Open up WinKFP.
- Select Configuration
- Uncheck Fast baudrate.
- To not increment the flash update counter, uncheck all UIF checkboxes.
- Click OK, cancel all the prompts about creating the new config files, click Ok to save to INI file.
- Select F1 Comfort Mode.
- Select F3 Update ZUSB.
- Select the ECU to update (ex: GD20, GD8604, MDS43, MDS451, etc.).
- Select F4 Enter VIN and paste in the full VIN for the car.
- Select F8 Done.
- Select F3 Prog. ZB-Update to detect current version and latest available update version.
- Click OK to begin flashing.
- It takes 43 minutes for MS45.1, 20 minutes for MS43, 7 minutes for GD20, 12 minutes for GD8604).
- After the confirmation message of flash update complete, close WinKFP.
- Wait one minute.
- Turn off the ignition key.
- Wait one minute.
- Turn on the ignition key to position 2.
- Clear adaptations using either INPA or PA Soft 1.4:
- Start INPA, select DME, Errors, Adaptations.
- Start PA Soft 1.4, select Units, select DME/DDE, select called "DME-EWS Adaptations".
- Clear any error codes in both DME and EGS. Turn off key for one minute. Try again. Do this until all are cleared.

7.12.2021

Program BMW Single ECU with Icom ISTA+ or Esys

 Problem:

there is a car 2020 year model, X750i . I want to program right Headlight only with Icom ISTA+ but there is I couldn't find single ecu programming option, 

Software is calculating for many control unit update, 

Im new with Icom, Is there any way to do it, Im a bit afraid to do full programming as its time consuming and may cause something wrong with other ECU's.

Program BMW Single ECU with Icom

It’s better to program a single ECU using ESYS and ENET cable. Ista cant program one module. Esys is much safer and is faster. ISTA does not allow for “Expert” mode for single ECU flashing. All G-Series car are safe to flash using ENET and ESys.

7.01.2021

How to restore ICOM Next when all LEDs turn red?

 Problem with BMW ICOM Next: did an update on my motorcycle and everything went fine and today when I connect icom to OBD – all leds are just on with red color, system one is blinking red/yellow.


Please do exactly as follow:

  1. Disconnect the ICOM Next device from the power supply or vehicle.
    2. Go to the directory

C:\ProgramData\BMW\ISPI\data\TRIC\ICOMNext\ICOM-Image-xx-yy-zz.
Note: This directory is hidden. Please see [?00045002EN].
2.1. Copy the file ICOM_Next-rootfs-xxxxxx.tar.gz to the root directory of the USB flash drive.
2.2. Copy the file ICOM_Next-app-yyyyyy.tar.gz to the root directory of the USB flash drive.

Note:
– An ICOM_Restore.bin file is not available. Please use the files from the ICOM Next firmware package as described above.
– xxxxxx and yyyyyy in the file names represent the version numbers of the respective files.
– If the directory contains more than one ICOM-Image-xx-yy-zz folder, please choose the most recent one, i.e. the folder with highest number. The ICOM Next will then be ready to use without further updates.
– It is important that the files are copied to the root directory of the USB flash drive.

3. Connect the USB stick to the ICOM Next.
4. Press and hold the button located on the right-hand side of the ICOM Next, next to the OBD II cable connection socket.
5. Continue to hold the button, connect the device to the vehicle’s OBD II jack and keep the button pressed until the LEDs on the ICOM Next glow red.
6. Release the button and within five seconds, push the button three times. This starts the firmware update.
Note: The update may take several minutes. Do not disconnect the ICOM Next as long as any LED glows red.
7. When all LEDs on the ICOM Next have stopped glowing, the Emergency Firmware Update is complete. You can now disconnect the USB flash drive.
8. IMPORTANT: When the Emergency Firmware Update is finished, the ICOM Next must be connected to your network with a LAN cable in order to be reconfigured since all previous settings have been lost. If there is a “user.settings” file on the USB flash drive, it will be installed after the firmware update.


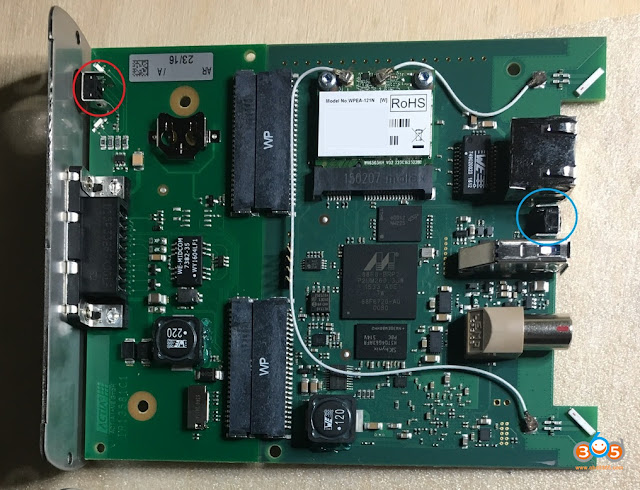
The RIGHT reset button on Original ICOM Next the button behind the tiny black hole! (in red circle).

restore-icom-next-1


WARNING!

Not Orig ICOM NEXT has another reset button!!!!
The red circle is a NON OEM ICOM NEXT reset button, and the blue is the OEM ICOM NEXT reset button!!!!!

restore-icom-next-2


And there is one original ICOM NEXT PCB where a reset button in the blue circle! (NOT THE RED!!!)

restore-icom-next3


Question: what icom_restore.bin is doing?

Answer: The existing restore.bin is for ICOM A or A2!


And here is one user’s success feedback: Yesterday out of a blue my ICOM Next OEM has stopped to work, ethernet can’t find IP address. In about 2 minutes ICOM was recovered and connected to the ethernet network. PS: He follow the above ICOM Next store procedure.


Best source of BMW ICOM NEXT:

https://www.obdii365.com/producttags/2021.06-bmw-icom-next.html