Showing posts with label bmw coding tools. Show all posts

12.11.2018

How to Reset ELV Counter Warning Light with Ediabas

How to Reset the ELV Counter (Steering Lock) Red Warning Light and your ELV is working, due to a bad battery
So, what is going on? The CAS module has a counter, when this counter exceed the max, a RED warning light come up. When you use a bad battery (low voltage) the ELV works but indicate an error to the CAS module.
Vehicle Tested: R56 Mini

Note: This only works if your ELV works fine and you're having this issue because you didn't replace your battery on time and waited 

To reset the ELV Light, you will need to use the EDIABAS ToolSet 32 software from the BMW Tools Package.

ediabas-reset-bmw-elv-counter-1
On the menu, select File -> "Load SGBD, Group File F3"
ediabas-reset-bmw-elv-counter-2

Look for "Cas.prg" on the file list.

ediabas-reset-bmw-elv-counter-3

Look on the Job list the name: "steuern_elvcounter_cas_loeschen" and "steuern_elvcounter_elv_loeschen". Double click on each one, and wait for a window, it says "Job Done" on the bottom. 

ediabas-reset-bmw-elv-counter-4

DONE!, no more Red Light Steering lock issue. 

12.10.2018

How to use BMW Coding Tool 2.50 to update SP-DATEN Files

The BMW Coding Tool 2.50 allows you to update your SP-DATEN (Data files) automatically instead of manually installing the files by copy and pasting files. It will automatically update the files that require replacing and skip the files that you don’t need!

Related Products:

The BMW Coding Tool is installed when you install your BMW Tools Package. You can find the shortcut on the desktop.
Software Included in BMW Tools Package:
  • INPA 5.06 (Script files in English)
  • EDIABAS 7.3.0
  • NCS Expert 4.0.1 (Menus and Buttons in English)
  • NCS Dummy 0.6.04
  • Tool32 4.03
  • WinKFP 5.3.1
  • BMW Coding Tool v2.5.0 (alternative to NCS Dummy or  for updating DATEN files)
  • Integrated SP-DATEN v53.3 (light version, all you need for coding and diagnostics)
Required Hardware: K + D-CAN “INPA” OBD2 Interface Cable with FTDI FT232RL or FT232RQ Chip
(click to enlarge images)
update-SP-DATEN-Files-1
1. We need to set our default folders for NCSExpert, WinKFP, and EDIABAS. See the screenshots.
Set Default NCS Expert folder
Set Default Ediabas folder
Set defualt WinKFP -NFS folder
Shw default folders
Set custom picture
Reset windows size Sort list items
Show NCS Coding only
update-SP-DATEN-Files-2

update-SP-DATEN-Files-3

update-SP-DATEN-Files-4

update-SP-DATEN-Files-5

update-SP-DATEN-Files-6
2. Once all the folders are set we can now proceed to updating our SPDatens. Doing this by selecting the “Select SP-source” button and then select the folder with the new SPDaten. I always like to start with the earliest model which is E36.
Path should look something like mine in the screenshot.
update-SP-DATEN-Files-7
3. Now that we have set our SPDaten path we can now select the “Update SP-daten” button.
update-SP-DATEN-Files-8
Only all NEWER files will be copied from:
…\SP-DATEN-Exx\ECU –> …\EDIABAS\ECU
…\SP-DATEN-Exx\SGDAT –> …\EC-APPS\NFS\SGDAT
…\SP-DATEN-Exx\SGDAT –> …\NCSEXPER\SGDAT
…\SP-DATEN-Exx\DATEN –> …\NCSEXPER\DATEN\Exx
also update of files in …\NCSEXPER\DATEN
You will notice the files that have been replaced will display update –> **.** and the ones that did not require updating will displayremain –> **.**
In my case as displayed in the image below all will show remain because I have already updated them.
update-SP-DATEN-Files-9
4. Now repeat the same steps for WinKFP…
Select the “Update WinKFP” button and all folders will be copied and replaced from:
…\SP-DATEN-Exx\DATA –> …\EC-APPS\NFS\DATA
also update of SGIDC.AS2 in …\EC-APPS\NFS\DATA\GDATEN to adjust the “long lines”
backup’s of all folders are saved as …\name_date_time
update-SP-DATEN-Files-10
5. Once completed, repeat the same steps for all base models so from E36 to E89. Congratulations you now have successfully updated your NCSExpert and WinKFP with your latest SP-DATEN files.

9.27.2018

BMW Coding App Bimmercode vs. Carly vs. BimmerLink

What's the difference between Bimmercode, Bimmerlink and Carly?

Which one is best?

Which one is easier to use?


The three apps I could find and ultimately am reviewing are Bimmercode, Bimmerlink and Carly BMW. Let's break down the price first:


Bimmercode
Vgate iCar 2 Mini WiFi OBD - $22.99
BimmerCode App - $29.99
BimmerLink App - $29.99
Total for setup = $82.97 (plus local taxes)


Vgate icar 2 is the cheapest option, better use Vgate iCar 3.0 BT and Vgate iCar Pro 4.0 Bluetooth which has higher transmission rate.

vgate-icar-2


vgate-icar-2-3.0


vgate-icar-4.0


Carly BMW
Carly BMW Gen 2 WiFi OBD (iPhone) - $88.55 (not the best price)
Carly BMW Pro App - $44.99
iDrive Coding Add On - $14.99
Service Reset Add On - $4.99
Battery Registration Add On - $9.99
Total for setup = $163.51 (plus local taxes)

carly-bmw-app-1


carly-bmw-app-2

carly-bmw-app-3

Note* Now you can use Carly for BMW Pro cracked without special connector. Use default Bluetooth or WiFi OBD II adapter. Get the most out of your BMW by keeping it healthy, personalized and connected.

carly-bmw-app-4

I will compare what the apps do not share in common (features only available in one app). I will give my final thoughts on each app and final verdict.

A key note is that buying BimmerCode and BimmerLink will land you at the same price as Carly BMW Pro + iDrive Coding Add on. $60 and the apps try to be identical. Both will code/diag. The Lite or Free versions of both apps are for testing compatibility only.

*If you are using an Android phone, your only choice is Carly BMW. The reviews today are based off the iPhone apps. Bimmercode is iPhone ONLY*


General: Bimmercode

bimmercode-app


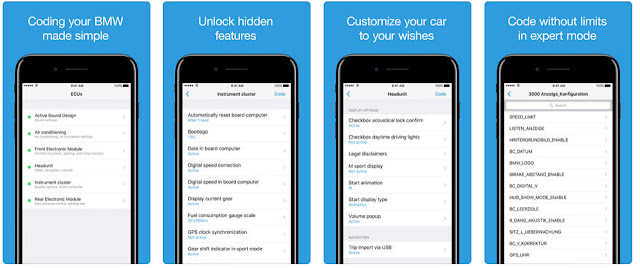
Bimmercode is unique in the sense that it splits its features into two individual apps. Both apps use the same OBD connector so no need to worry about purchasing another device. The interface is clean and easy to use. Cost savings can be had if you ONLY want to code. The BimmerCode app, codes, and thats about it. Unlike Carly BMW it does offer an advanced setting which looks to closely match the ability of dealership scanner. The modules turn to German text and the list grows very very long. Unfortunately, I am no expert, and really can't comment on how well Expert mode works or its ability to compete with a full PC/Software based setup. More on Expert mode later.

General: BimmerLink

bimmerlink-app

The BimmerLink app does the Sensor Values, Dashboard Values, ASD, and Exhaust Flap. Its the services app. BimmerLink has no official website and BimmerCode's website is pretty much just a landing page for the app. The website offers no insight as to the future direction that the apps will be taking. Additionally, it only covers Fxx Series BMWs and above.

General: Carly BMW

carly-bmw-app


Carly BMW packs all of its features into a single app. Ability to do everything via the Carly branded OBD connector. The interface is also clean and easy to use. The punch to the face comes when you purchase the Pro version only to find out that you must dole out more cash for Add-On packs. While you do get lifetime updates to both the connectors firmware and any features/packs you already purchased, it's fair to assume that any NEW Add-Ons will cost you. Carly BMW offers several additional features that Bimmercode does not(Service reset, Battery Programming, Used Car Check, Etc).

Unlike BimmerCode's website, Carly BMW's is full featured. Providing manuals, feature lists, and a spot that shows current projects/status. Carly promises to continue to update the app and the project list supports this claim. It covers both Exx and Fxx Series BMW's and above.


What the Apps do the same:
Diagnostics: Both apps appear to do the same. However BimmerLink fails to sort or translate into English. Carly BMW takes quite awhile longer to scan for errors, but offers the benefits of being able to scan all or select a specific module/s for scanning.


Coding: I can't do a full side by side comparison of every single possible feature. Both company websites have the full coding lists separated out by BMW Model. They match what many of the "Remote Services" offer. They backup the current reading and then allow you to code what you like. This is done on a module by module basis. Each module controlling certain features. BimmerCode was a major let down, while claiming to offer full coding on my model, I was only able to access 4 modules. Carly BMW had no issues accessing and coding them. Here are some screenshots: (Using one Module on each app as a display)


Exhaust Flap: For models that have an exhaust flap that opens or closes based on how heavy your foot is, both apps provide the ability to manually open or close it. Device needs to remain plugged in and connected to your iPhone. BimmerLink reported this was not available for my car and Carly BMW did give me the option. No screenshots as it's really a ON/OFF toggle.

Parameters / Sensors & Dashboard:
Both apps allow you to add and then track certain sensor values. However, (again) BimmerLink fails to translate in English. Carly BMW while limiting you to 6 parameters, does translate for you. Here are some screenshots:


What the Apps don't do the same:
This section is going to lean heavily in Carly BMW's favor. For a price, Carly BMW can do alot more. Let's start with Bimmercodes app's unique features:

BimmerLink
ASD or Active Sound Design is essentially using the speakers to create noise that sounds like your engine. I could not find this option in Carly BMW. However, the option was not available for my car using BimmerLink. I would assume it's just an on off toggle. No screenshots.

BimmerCode
Offers Expert mode which could be golden for the more technical coders. Unfortunately I don't know enough to give an in-depth analysis of this feature. But it looks to be a way to adjust the core values on each setting. However, this list is limited to the modules you can access, which was only a few on my car. Here is a screenshot: (Using coding module from above)


Carly BMW
Used Car Check: Essentially scans your car for parts that track miles. It will then analyze the miles vs your odometer. While no tampering was found on my car, it is a curious and potentially useful feature when it comes time to buy another car. Here is a screenshot:


Service Reset:
Does exactly what it says. Offers a quick way to reset the iDrive service settings. Here is a screenshot:


Battery Reset / Programming: Does exactly what it says. Allows you to program in a new battery. At $10 this is extremely useful, even if you only replace the battery once while owning your car. That savings alone pays for the entire app.


DPF ($9.99): I did not purchase this option as I don't have a Diesel car.


OBD Functions: I did not run this function during testing, but I do hope it comes in handy when I replace those o2 sensors.

Final Thoughts:

For my 2011 F10 535i, Carly BMW is the clear winner. Its easier to use and offers alot more functions than Bimmercode does at this time(For a price). While I assumed that Bimmercode will continue to get better, Carly BMW has a full company backing it. I don't see Bimmercode surpassing Carly BMW at anytime in the future. Overall I was disappointed with Bimmercodes apps. While the interface is cleaner and a cheaper setup, the non English translation and lack of available codings really hurts. Granted newer Fxx series may offer greater compatibility with BimmerCode, I cannot personally recommend it at this time. I still wanted to write the review since Bimmercode is cheaper and may do enough for some people at a much lower costs, it's just not as polished.


Suggestion:

It really depends on what your budget is.The biggest issue I have with BimmerCode is that it lacked support for two of the 6 modules in my car. Carly BMW can code all 8. If you have the money, I would go with Carly BMW at this time. If you are looking for the cheapest possible route than BimmerCode is the way to go.
Vgate iCar Pro Bluetooth 4.0 OBDII scanner for Android & iOS

8.12.2018

How to do BMW coding with ISTA on MacBook Pro

Here are the details of my setup of MacBook Pro with VW Fusion – Windows 10 or Bootcamp, both working for BMW coding with ICOM software.

Hardware: 2015 Retina Macbook Pro 16GB RAM, 512GB SSD
Software: VMWare Fusion 10


VM Specs:
Windows 10 64Bit
4GB RAM
Thinly provisioned 200GB VM. (Thin means it only takes the space it is using but Windows thinks it is 200GB total.)

Software working on VM:
BMW Standard Tools 2.12 (NCSexpert, WinFKP, INPA, etc)
ISTA-D (Dealership Diagnostic Software, I did not install ISTA-P due to space concerns)
E-Sys (For newer Fxx/Gxx/Ix cars)

I back up my VM on an external hard drive and I take snap shots of the VM in case upgrades to the software fails and breaks.

I am very happy with this setup.


Another option instead of VM fusion is to bootcamp the mac. That’s what I’ve done also. It partitions the hard drive into separate drives, allowing you to boot the Mac up into windows natively. Then used bimmergeeks.com software packages. It’s very clear and easy to understand. It’s also been condensed some and has the most recent updates in place….just make sure you have enough HD storage in general before doing any of this…and get a good cable such as the cable off http://www.obdii365.com/wholesale/bmw-inpa-k-can-with-ft232rq-chip.html…don’t want to mess around with crappy cheap amazon cables.


BootCamp

Pros:
  1. Free + windows 10 license
  2. All system resources are utilized by Windows only.
  3. Acts like a windows machine

Cons:
  1. Requires permanent space allocated to BootCamp
  2. Requires rebooting if you ever want to go back to Mac
  3. Unable to write into MacOS side of things without 3rd party drivers


VM

Pros:
  1. Snapshots
  2. Space allocated is only like a file, so free space is still utilized by Mac
  3. No need to restart to get into Windows for something.

Cons:
  1. Not free, and annual upgrades start to cost a lot
  2. Shares resources with MacOS which can be limited if the Mac doesn’t have enough RAM, CPUs etc.
  3. A little more complicated in initial setup sometimes.


Both have its merits and I ultimately like VMs when the mac has enough resources to run it.

5.24.2018

BMW E90 New Battery Coding & Register FAQ and Guide

Check information below to read if you’d like to know why coding/register BMW ss important and how you can get it done yourself!

Credit to bNks334 from bmw e90post forum. You are at your risk. 

Q: I have an older E90, does this apply to me?
A: This guide only applies to vehicles equipped with IBS (intelligent battery sensor). Registration and coding will not be successful on older vehicles that are equipped with basic power management systems.

Q: I replaced my battery and it works just fine, why all the fuss?
A: Disregarding the need to register and code for a new battery may result in improper charging. Over time, improper charging may have detrimental effects on the lifespan of your cars battery and the operation of the vehicles electronics.

Q: Why do I need to register a new battery?
A: The short answer is that BMW designed the charging system with an algorithm that varies the rate of charge by the age and type of the battery installed. Registering a new battery resets the algorithm back to optimal charging voltage for the specified battery.

Q: Why do I need to "code" for a new battery?
A: The answer to this varies. You may not have to! That is, so long as you replace your old battery with an exact replacement. However, if you switch from a wet-cell type battery to an AGM type battery, or vice versa, you must code for the change.

AGM and wet-cell batteries require a different rate of charge output from the alternator. Moving between these two types without coding can lead to over-charging or under-charging.
Also, batteries have a discharge rating called amp hours (ah). You must specify to the DME what the “ah” rating of your battery is so the car can run the proper charging algorithm.

Q: I bought a lightweight battery, but the “ah” rating for my new battery is less than the lowest setting available in the CAS/NFRM module. Is this ok?
A: While not ideal, you can certainly use your new battery. Code your car for the setting that best matches your new battery. Most important is ensuring you’ve changed the settings from wet-cell to AGM type, if necessary. Consequently, you may negatively impact the life expectancy of the new battery by coding say an 80ah AGM charging map when your lightweight battery has a discharge capacity of only 18ah…

Personally, I am running a Deka/East Penn Sports Power ETX-30L Battery ($103.99). I used XS Power 586 Tall Brass Post Adaptors (M6 Thread). The Deka ETX-30L is rated 400CCA @ 28.6Ah(20HR) and is a 21lb AGM type battery. EDIT: I now run a PC925. Both these batteries crank the car strong, but I would not recommend ever using anything weaker!

My 2011 E82 did not have a charging map listed in the CAS module for anything less than 80ah AGM. Therefore, this is what I chose when I coded my car (initially). There are people that have reported seeing options in the CAS module for as low as 40ah AGM. I believe updating to a newer CAS ZB software may provide more options. Or, maybe the additional options are only available in the CAS module for higher end models like 335is E92’s? I can only speculate as to why some people have more settings available than others.

I ended up using Carly to code my battery again. Even though the lowest setting I found in the CAS module was 80ah AGM, Carly provided a 36ah AGM option. After using Carly to code my new battery, INPA does indeed confirm (see appendix D) the charging system is using a 36ah AGM charging map, or at least INPA recognizes that’s what Carly set it to


Q: What cable do I need to connect to use BMWtools on my laptop/device?
A: I use a generic OBDII to USB (K+DCAN) cable I got off amazon, and it works fine:
http://www.obdii365.com/wholesale/bmw-inpa-k-can-with-ft232rq-chip.html

Q: Can I use Bluetooth?
A: I bought a generic ELM327 OBDII to Bluetooth adapter for use with apps like Carly, Torque, Trackaddict, and Harry’s lap time to name a few, and it works fine:
http://www.obdii365.com/wholesale/elm327-bluetooth-software-obd2-eobd-can-bus-scanner-tool.html

Q: I installed a battery with exact replacement specs (e.g. 80ah wet cell with 80ah wet cell). How can I register my new battery?
A: There are several methods that can be used to register a new battery. See options 1, 2, and 3 below:

Q:
 I installed a battery of a different type and/or capacity (e.g. 80ah wet-cell with a 90ah wet-cell, or, 90ah wet-cell with a 40ah AGM). How can I code for the changes I made to the battery?
A: There are several methods that can be used to code for battery changes. See options 1, 2, 4, and 5, below:

Option 1:

Overview:

Carly is an Android/iOS app that can be used to painlessly register and code a new battery. Just purchase the app, and the in-app purchase for the battery module, and it walks you through the process.

Steps:
1) Download the Carly app on your device ($44.99 + $9.99 for battery module):
2) Verify your OBDII to USB cable is working properly or that your OBDII to Bluetooth adapter is properly paired to your device and communicating with Carly.
3) Purchase the in-app battery module. From here, Carly walks you through the steps of both registering the battery and coding for any changes. It’s that simple.

Option 2:

Overview
:
Use Rheingold (ISTA-D) to REGISTER and/or CODE a new battery. The virtual machine, mentioned above, comes pre-loaded with this dealer level software. An ICOM emulator is all setup for you to use this program with the aforementioned K+DCAN cable.
  • Rheingold is an amazing tool. It will automatically diagnose issues with your vehicle and provide a corrective action plan to fix them. It will even tell you the steps you need to take to re-program things with a separate program called ISTA-P.

Steps:

1) Turn ignition to the “on” position. INPA can be used to verify the car is communicating properly. INPA shows when the ignition is in the on/off position.
2) Load Rheingold
3) Click the “Identification” tab
4) Click “Read out” tab and then “start” in the bottom right (takes a long time to gather cars info)
5) Once vehicle info has loaded (verify your vin is accurately displaying) click the “Vehicle management” tab
6) Navigate to: Service function>body>voltage supply>battery>register and then click “start search”
7) Select result “ABL register battery replacement ”
8) Rheingold then walks you through your options! You can simply register a new like-for-like battery, or you can change the battery capacity. Rheingold will prompt you to perform coding using ISTA-P!

Option 3:

Overview:

Use Ediabas Toolset32, a software packaged with the BMWtools suite, to REGISTER a new battery

Steps:
1) Run Tool32.exe
2) Navigate: File>Load SGB>C:/EDIABAS/ECU/[choose the appropriate .prg file for your DME – see appendix A]
3) Look up steuern_batterietausch_registri (near bottom of job list)
4) Go to Jobs menu
5) Select Run Job (German: Job Einmal Ausfuhren [run job once])
6) Verify operation reports “Okay”

Option 4:

Overview:

This method is a bit incomplete in regard to coding. It uses NCSexpert to edit the settings in the CAS and NFRM modules. Essentially, you are manually changing the settings in the CAS/NFRM module to reflect the new battery.

*****While this method seems like a straightforward way to code for battery changes, it fails to address the issue of vehicle order (VO). This could have implications for future coding and ZB updates. See option 5.

*****After completing this coding, you must still perform "Option 3" to register the new battery using Tool32. Or, you can use ISTA-D to do the registering, but then you might as well also use ISTA to do the programming at that point...

Steps:

1) Load NCSExper.exe
2) Select a profile that has manipulation enabled: File>load profile> “CNCcoding”
3) Select: F1>F3>select your chassis>select “CAS
4) Press F6 for back
5) Press F4 to select a specific module “Process ecu” then you get a list of all modules available for your car
6) Select “CAS” then select “READ ECU” this is going to read all the values from the specific module and create an FSW_PSW.TRC file with the values
8) Leave NCSExper.exe open and navigate to the “work” folder ([X]:\NCSEXPER_64\WORK)

The FSW_PSW.TRC file we generated when we “read” the CAS module is where we are going to change the battery settings. After making our changes, we will then change the file extension to the file type NCS uses to write to the selected module (.MAN).

At this point, you can also use a program called NCSDummy to make things easier. You can use NCSDummy to import the .TRC file. NCSDummy will provide translations and descriptions for all the settings in the CAS module. I will not cover the details on how to use NCSDummy, it is very easy if you search. The following steps continue with how you can just simply edit the .TRC file in notepad to achieve our goal of coding a new battery:

9) Open the generated FSW_PSW.TRC file with notepad
10) Select: File>save as>FSW_PSW.MAN (be sure to select “save as type” to all files so that it will accept the “.MAN” extension. If you fail to do so it will just save it as a text file .TXT)
11) Search for the option “KLASSE_BATTERIE” and change the value from its current setting to a setting that most closely matches the rating of your new battery (e.g. “90ah” to “70ah” or if using an AGM battery “70ah_agm”) (see Appendix E)
12) Select: File >Save
13) Back to NCS now hit F5 for basic functions
14) Select “coapiReadSgGetFswPsw” and then “ok.” You are basically telling NCS to read all the values from your .MAN file. You will see a screen… just press ok. Then press ok again.

Ok now take a look where it says “JOBNAME = CODIERDATEN_LESEN” We need to change that to a coding function because we want to write the changes to the module, not READ as we did earlier.

15) Select F2 “job”
16) Select SG_CODIEREN and press ok 
17) Then press F3 to execute the job. After a pause you will see the “coding ended” message!

I am not sure if these steps are 100% what you’ll see. It’s been a while since I coded my battery, but I’ll update the steps as needed.

Instead of clicking "Process ECU", you can click "Process car" (F3), and then "Code Car" (F1). This will code every module in the car (might take longer like 5minutes) for the changes you made in the .MAN folder for the CAS module we read. There are changes that may need to be made in NFRM that this will take care of.

The battery rating should now be updated in the system. You can verify the coding was successful by performing the steps outlined in Appendix D.

Option 5:

Overview:

This is the proper method to manually code for changes to the battery. Your vehicle order (VO) stores all the information regarding the various hardware your car came with from the factory. For example, if your car came with a wet-cell 70ah battery, your VO will read out with attribute -B070 (see Appendix B). Now, lets say you used option 4, above, to manually change the CAS module to reflect a new 70ah AGM battery. Your VO will still reflect the old battery of –B070. You want your VO to be updated to read -A070 (see Appendix B).!

If you go to the dealer, their software (Rheingold/ISTA-D and ISTA-P) will read your VO and recommend diagnostic/programming changes as if you still have that old battery installed. Basically, their software would overwrite the changes you made in option 4 and set all the coding back to the settings that reflect the old battery!

This is also how people lose their DEALER flashed PPK tune. The dealer fails to perform the proper programming portion of the PPK flash and the VO is never updated to reflect the PPK tune is installed on the vehicle. Return visits to the dealer then results in the dealers software to recommends DME updates that overwrite the PPK dme software! If you properly update the VO then only software, and settings, that matches your cars hardware will be recommended!

Steps: 
Changing VO
1. Open NCSEXPER.exe
2. Select: File > Load profile > Select a profile that has manipulation enabled (“CNCoding”) > Click OK
3. Press F1 (VIN/ZCS/FA)
4. Press F3 (CS/FA f. EC) > Select E89 (chassis family for E9x and E8x vehicles) > Click OK > Select CAS > Click OK
5. Press F6 (Back)
6. Press F1 (VIN/ZCS/FA)
7. Press F2 (Enter FA) > Select E89 > Click OK
8. A window labeled “Enter VIN” appears with your vehicles VIN number filled in > Click OK
9. A window labeled Enter FA appears > scroll to find VO for old battery (-B090) > highlight –B090 and press delete on keyboard
10. Enter –A080 (see Appendix B) in the “Attribute” box > Click Add > Click OK
11. Press F6 (Back)
12. Press F4 (Process ECU) > Select CAS > Click OK
13. Press F2 (Change Job) > Select FA Write > Click OK
14. Press F3 (Execute Job)
15. Verify that the write is complete “Job Ended”
16. Press F1 (Change ECU) > Select FRM/NFRM > Click OK
17. Verify lines: get coded, FRM, JOBNAME = FA_Write
18. Press F3 (Execute Job)
19. Verify that the write is complete “Job Ended”
20. Press F6 (Back) > Exit NCSEXPERT

The CAS and NFRM/FRM modules will now always default back to the new attributes you assigned to the VO!

It is important to now use NCSExpert to code the car to the new VO settings. If you properly changed the VO, NCSExpert will automatically write the battery capacity and type settings to the various modules. This is what we did manually in option #4!

1. Open NCSEXPERT
2. File > Load profile > Select a profile that has manipulation enabled (“CNCoding”) > Click OK
3. Press F1 (VIN/ZCS/FA)
4. Press F3 (CS/FA f. EC) > Select E89 > Click OK > Select CAS > Click OK
5. Press F6 (Back)
6. Press F3 (Process Car)
7. Press F1 (Code Car)

Appendix A:

MSV70,MSV 70.0 for N52 (NG6),
MSV80,MSV 80.0 for N52KP (NG6),
MSD80,MSD 80.0 for N43 N53 & N54 with EWS4/CAS,
Mevd172KW, Mevd 172 for N55 (Older N55’s up to late 2011 production)
Mevd176k, Mevd 176k for N55 (late 2011 production date or newer)
MSS60,MSS60 for S65 (M3),

Appendix B:

"B" represents wet-cell, while "A" represents AGM in the VO.
E B046 BATT_46AH //46 Ah-Batterie
E B055 BATT_55AH //55 Ah-Batterie
E B070 BATT_70AH //70 Ah-Batterie
E B080 BATT_80AH //80 Ah-Batterie
E B090 BATT_90AH //90 Ah-Batterie
E A070 BATT_AGM_70AH //70 Ah-AGM Batterie
E A080 BATT_AGM_80AH //80 Ah-AGM Batterie
E A090 BATT_AGM_90AH //90 Ah-AGM Batterie

Appendix C:

  • ISTA/D (aka Rheingold) is the current dealership diagnostic software for all Exx and Fxx cars.
    • ISTA/D is the replacement for older dealership "DIS" diagnostic software.
  • ISTA/P is the current dealership programming software for all Exx and Fxx cars.
    • ISTA/P is the replacement for the older dealership programming software “SSS.”
  • ISTA/P & ISTA/D are designed to be used with an ICOM Interface, and with full ICOM-A-B-C, you can connect to older cars. The ICOM "C" Connection is for the older BMW ADS 20-pin round "Pacman" connector in the Engine Bay. You can find versions of ISTA/D with an ICOM Emulator built-in that allows you to use it with an ENET Interface for Fxx cars and a DCAN Interface for Exx cars.
  • INPA (interpreter for test procedures) is an older factory floor diagnostic software, designed to run test procedures. While INPA can be set to an English User Interface, most of the Test Procedures (scripts), which can be difficult to find, are in German.
  • WinKFP is for flashing/reprogramming modules
  • NCSexpert is for coding, it can be used to set up options and enable things
  • Tool32 is like a DOS cmd box for the modules, it's text based and can it's able to ask the ECUs various questions and show the answers (like status, programming data etc)

Appendix D:

Verify changes:

To see the current rate your battery is charging at, open the INPA program>> E90>>ENGINE>>MSD80>> Status(F5)>>PM-IBS>>PM FIELD 2 . Under the PM Field option look at the ah reading registered, to see what it's set at to charge your battery at present. If it's incorrect, you need to re-try the options outlined above. Once you have done this, re-register your battery using the Tool32 program. Then go back into INPA and check the PM Field 2 again to see if the new ah reading has been registered.

Appendix E:

KLASSE_BATTERIE BATTERY TYPE
wert_00 value 00
80ah 80 ampere-hours
90ah 90 ampere-hours
110ah 110 ampere-hours
70ah 70 ampere-hours
55ah 55 ampere-hours
46ah 46 ampere-hours
70ah_agm 70 ampere-hours (agm)
90ah_agm 90 ampere-hours (agm)
60ah_agm 60 ampere-hours (agm)
80ah_agm 80 ampere-hours (agm)